Thursday, December 6, 2018

Vegetable Hakka Noodles | Restaurant Style & Homemade


From upscale restaurants to roadside street food, Vegetable Hakka Noodles is very popular across all of India and is often served in parties and restaurants as a snack or main course.

Vegetable Hakka Noodles is an Indo-Chinese preparation that is made by tossing boiled noodles and stirring the fried vegetables with Chinese sauces which gives its signature taste and texture.

Ingredients

  1. Noodles - 2 small packs 
  2. Onion - 1 (sliced) 
  3. Green Chili - 3 (half-slit) 
  4. Garlic - 5 to 6 (finely chopped) 
  5. Capsicum - 1 cup (juliennes, yellow, green, red) 
  6. Cabbage - 1 cup (finely shredded) 
  7. Carrot - 1 (juliennes) 
  8. Spring Onion - 1tablespoon (finely chopped) 
  9. Cooking Oil - A teaspoon and 4 Tablespoons 
  10. Salt as per taste 
  11. Soya Sauce - 2 teaspoons 
  12. Red Chili Sauce - 1 teaspoon 
  13. Green Chili Sauce - 1 Teaspoon 
  14. Vinegar - 1 teaspoon 
  15. Black Pepper Powder - 1/2 Teaspoon 

Direction/Method

  1. First, boil the noodles. 
  2. Take a pot and add some water. 
  3. Switch on the flame and wait for the water to heat for some time. 
  4. Add little salt into the water and a teaspoon of cooking oil because oil really helps in preventing the stickiness of noodles. 
  5. When the water is hot enough, add two small packs of noodles. You can use any type of veg noodles for this recipe. By the way, this recipe will become even more healthier by using whole wheat noodles. 
  6. Boil the noodles them until they are cooked but not mushy. Just ensure that you don't overcook them. 
  7. When these noodles are packed, they would be tangled to each other. Use a spatula and carefully try to remove the tangles as much as possible. 
  8. When the noodles are boiled enough, I'm going to strain the noodles using a strainer. 
  9. Run these hot noodles under cold water to remove the excess starch. 
  10. Keep the noodles aside by transferring them to a bowl. 
  11. Next step, take a large wok such as a Chinese wok because cooking noodles in a large wok make a good difference. A heavy bottom pan, cast iron skillet, a kadai or a wok can also be used as they will also work very well for this recipe. 
  12. Add 4 tablespoons of cooking oil and let the oil heat on a medium flame. The key here is to add bit more oil to get the restaurant type of taste. 
  13. Add a sliced onion, 6 finely chopped garlic and 3 half slit green chilies. 
  14. Mix and sauté them for few seconds. 
  15. Typically, the Indian style vegetable Hakka noodles will be loaded with onion, cabbage, capsicum, carrots, and spring onions. 
  16. Add a carrot which has been cut into juliennes and a cup of capsicums which is also been cut into juliennes. 
  17. Mix them well. 
  18. Ensure to cut these veggies into thin juliennes because thick slices of vegetable don’t taste good for Hakka noodles. Hence chop, slice and keep everything ready before you start as you will not get the time to chop in between. 
  19. Add a cup of finely shredded cabbage. 
  20. Mix and sauté them for a minute on a high flame so that the vegetables remain crunchy and you get restaurants like taste and texture. 
  21. If preferred, add and replace some of the vegetables with baby corns, mushrooms or any other vegetables of your choice. 
  22. Add 2 teaspoons of soya sauce, a teaspoon of red chili sauce, a teaspoon of green chili sauce, a teaspoon of vinegar, and 1/2 teaspoon of black pepper powder. 
  23. Add salt as per taste. Don't add too much of salt because the sauces will usually have salt in them. 
  24. When it comes to sauces, use any sauce of your choice and adjust them as per your taste. 
  25. Mix them well. 
  26. Add the boiled noodles. 
  27. Remove the tangles in noodles and mix them well 
  28. Cook this for a minute on a very high flame and keep mixing them. Always remember to cook on a high heat because with any fried noodles recipes this one too has to be prepared on a high flame as it brings out a smoky aroma. 
  29. This recipe is quite healthy since they are loaded with veggies and when they are fried they give an enjoyable crunchy texture along with sauces that give a distinctive flavor. 
  30. Toss them for few times. 
  31. Vegetable Hakka Noodles are ready. 
  32. Lastly, add finely chopped spring onions and toss them again. 
  33. To serve, this recipe is usually served with tomato and green chili sauces. 
Vegetable Hakka noodles are generally eaten on their own, but some people prefer to have it with some side dish. Hence you can serve them with Veg Manchurian or Gobi Manchurian.

Youtube Video


***********************************************************************
Subscribe to my YouTube channel for new recipes!
https://www.youtube.com/channel/UCs28FxRyBwsYgOo0VLJzugQ
***********************************************************************
Follow me on...

Blogspot - https://myyummyrecipes1981.blogspot.com/
Facebook - https://facebook.com/myyummyrecipes1
Google Plus - https://plus.google.com/u/0/116660025106969274621/posts
Twitter - https://twitter.com/MyYummyRecipes
Instagram - https://www.instagram.com/myyummyrecipes1/
Tumblr - https://www.tumblr.com/blog/myyummyrecipesblog
Pinterest - https://in.pinterest.com/myyummyrecipes1/
LinkedIn - https://www.linkedin.com/in/anitha-kiran-0a41a0175/
Gmail - MyYummyRecipes1@gmail.com

Website - www.MyYummyRecipes.in

Tuesday, December 4, 2018

How To Make Homemade Tomato Sauce


Below are the step-by-step instructions to convert the gorgeous looking tomatoes into jars of delicious red sauce. Making tomato sauce isn't very hard, but it takes some time.

Ingredients

  1. Tomato - 500 Grams (cut a tomato into 4 pieces) 
  2. Sugar - 1/2 Cup 
  3. White Vinegar - 2 Tablespoons 
  4. Kashmiri Red Chili Powder - 1/2 Teaspoon 
  5. Salt as per taste 

Direction/Method

  1. Take 1/2 kilo of fresh tomatoes and cut each tomato into 4 pieces. 
  2. Add the chopped tomatoes into a pressure cooker and a little bit of water. 
  3. Close the lid and pressure cook the tomatoes for about 4 whistles until they are cooked nice and soft. 
  4. After 4 whistles, switch off the flame. 
  5. Don't open the pressure cooker right. Wait for the pressure to reduce in the cooker, it may just take some time. 
  6. Ensure that the tomatoes are cooked nice and soft. 
  7. When the tomatoes are not hot anymore, take transfer them into a blending jar and blend the boiled tomatoes into a smooth paste. 
  8. When the paste is ready, strain the paste to remove the pulp. 
  9. Also, strain the remaining tomato water into this. 
  10. What we now have is tomato puree which is used to make tomato sauce. 
  11. Next step is to take a saucepan and heat it from some time. 
  12. When the pan is hot enough, add tomato puree and cook them for about 4 to 5 minutes on medium flame. It is very critical to keep stirring the puree while it is being cooked. 
  13. When the puree becomes little thick in consistency, add 1/2 cup of sugar, 1/2 teaspoon of Kashmiri red chili powder, 2 tablespoons of white vinegar and salt as per taste. 
  14. Mix them well and cook them for about 10 minutes on a low flame until the puree becomes thick. 
  15. Keep stirring it again, in between. 
  16. When the consistency of the sauce becomes thick, add few drops of the sauce on a plate and slightly tilt the plate. 
  17. If no liquid or water coming out of the sauce, that means the tomato sauce is ready. 
  18. Switch off the flame and allow the sauce to cool down to the room temperature and then it can be transferred to a serving bowl or stored in any jar.

Youtube Video


***********************************************************************
Subscribe to my YouTube channel for new recipes!
https://www.youtube.com/channel/UCs28FxRyBwsYgOo0VLJzugQ
***********************************************************************
Follow me on...

Blogspot - https://myyummyrecipes1981.blogspot.com/
Facebook - https://facebook.com/myyummyrecipes1
Google Plus - https://plus.google.com/u/0/116660025106969274621/posts
Twitter - https://twitter.com/MyYummyRecipes
Instagram - https://www.instagram.com/myyummyrecipes1/
Tumblr - https://www.tumblr.com/blog/myyummyrecipesblog
Pinterest - https://in.pinterest.com/myyummyrecipes1/
LinkedIn - https://www.linkedin.com/in/anitha-kiran-0a41a0175/
Gmail - MyYummyRecipes1@gmail.com

Website - www.MyYummyRecipes.in

Saturday, November 24, 2018

Palak Pulav | Spinach Rice | Home-made and Healthy Palak Pulav


Palak Pulav is a healthy and delicious recipes which is made using Indian spinach, rice and some mild spices. It is a flavorful recipe and easy to prepare. Palak, called Spinach in English, is very healthy because it is a rich source of iron, calcium and other minerals.

Ingredients

  1. Basmati Rice - 1 Cup (cleaned and washed)
  2. Cooking Oil - 3 Teaspoons
  3. Star Anise - 1Green Cardamoms - 2 Pods
  4. Cloves - 3
  5. Cinnamon Stick - 1 Inch
  6. Curry Leaves - 5 to 6
  7. Cumin Seeds - 1/2 Teaspoon
  8. Bay Leaf - 1
  9. Palak (Spinach) - 1 Bunch
  10. Green Chilies - 2 to 3 (half-slit)
  11. Ginger Garlic Paste - 1 Teaspoon
  12. Onion - 1 (sliced)
  13. Tomato - 1 (finely chopped)
  14. Potato - 1 (finely chopped)
  15. Fresh Green Peas - 1/4 Cup
  16. Capsicum - 1 (cut into cubes)
  17. Garam Masala Powder - 1/4 Teaspoon
  18. Turmeric Powder - a pinch
  19. Salt as per taste
  20. Mint Leaves - 10 to 12
  21. Lemon Juices - 1 Teaspoon (Optional)
  22. Water (as needed)

Direction/Method

  1. Wash a bunch of palak and remove the hard stems.
  2. Add the washed palak in a blender and add a little bit of water to make a puree.
  3. When the puree is ready, keep it aside.
  4. Next, add 3 teaspoons of cooking oil in kadai.
  5. When the cooking oil is hot enough, add 1/2 teaspoon of cumin seeds, a bay leaf, 3 cloves, an inch of cinnamon stick, a star anise, and 2 green cardamom pods.
  6. Add a teaspoon of ginger garlic paste and saute them until raw smell of ginger garlic is gone.
  7. Add an onion which has been sliced, few curry leaves, 3 green chilies which have been half slit, a capsicum which has been cut into cubes.
  8. Mix them well and saute them for a minute on a medium flame.
  9. Add a finely chopped potato, 1/4 cup of fresh green peas, a finely chopped tomato, few mint leaves, a pinch of turmeric powder, 1/4 teaspoon of garam masala powder, and salt as per taste.
  10. The vegetable that you add into this recipe can vary depending on your personal choice and you can always mix and match them.
  11. Mix them all and saute them for a minute.
  12. Don't add too many vegetables into this recipe because palak pulav tastes good on its own without the addition of vegetables.
  13. Pour palak puree into this and saute them for 2 to 3 minutes until the raw smell is gone.
  14. Add a cup of basmati rice. You can use any regular rice instead of basmati rice.
  15. Add 1 3/4 cup of water and mix it well
  16. Cover the lid and cook this for about 5 minutes on a medium flame and then on a low flame for 10 to 15 minutes.
  17. When the rice is nicely cooked, add a teaspoon lemon juice which is optional and mix it again. 
  18. Switch off the flame and serve the Palak Pulav with onion and any raitha or chutney of your choice.

Youtube Video


***********************************************************************
Subscribe to my YouTube channel for new recipes!
https://www.youtube.com/channel/UCs28FxRyBwsYgOo0VLJzugQ
***********************************************************************
Follow me on...

Blogspot - https://myyummyrecipes1981.blogspot.com/
Facebook - https://facebook.com/myyummyrecipes1
Google Plus - https://plus.google.com/u/0/116660025106969274621/posts
Twitter - https://twitter.com/MyYummyRecipes
Instagram - https://www.instagram.com/myyummyrecipes1/
Tumblr - https://www.tumblr.com/blog/myyummyrecipesblog
Pinterest - https://in.pinterest.com/myyummyrecipes1/
LinkedIn - https://www.linkedin.com/in/anitha-kiran-0a41a0175/
Gmail - MyYummyRecipes1@gmail.com

Website - www.MyYummyRecipes.in

Friday, November 9, 2018

Aloo Jeera Dry | How to make Aloo Jeera Dry | Aloo Jeera Recipe (2018)


Aloo Jeera Dry is a quick and easy potato recipe which is perfect for a lunch or dinner menu. It is flavorful, delicious and mouth watering as well. It is a classic north Indian recipe. It is very simple to make and takes a very less time as well because only some potatoes are boiled and sautéed with roasted cumin seeds and some regular spices. There are many variations of this recipe. The ingredients used for the recipe and the way it is prepared varies depending on the region. Aloo Jeera recipe is also prepared on special occasions and festivals like Navratri and fasting because no onions or garlic are being used and it is the main reason why it is consumed often during fasting and termed as one of the fasting recipes.

Ingredients

  1. Potatoes - 2 (peeled and cut into cubes) 
  2. Cooking Oil - 2 Teaspoons 
  3. Cumin Seeds - 1 Tablespoon 
  4. Ginger - 1 Inch (finely chopped) 
  5. Green Chili - 2 (finely chopped) 
  6. Turmeric Powder - 1/2 Teaspoon 
  7. Red Chili Powder - 1 Teaspoon 
  8. Coriander Powder - 1/2 Teaspoon 
  9. Asafetida (Hing) - a pinch 
  10. Salt as per taste 
  11. Water 
  12. Coriander Leaves - 2 Tablespoons (finely chopped) 

Direction

  1. First, take a bowl of two potatoes which have been peeled and cut into small cubes. 
  2. Instead of regular potatoes, baby potatoes can also be used as they are often used when making aloo jeera dry. 
  3. Add these potato cubes in a pressure cooker. 
  4. Pressure cook the potatoes for about a whistle on a medium flame. Do not over boil the potatoes otherwise they will become mushy. Moreover, the potatoes should be semi-boiled and not fully cooked. 
  5. Next, take a pan and add 2 tablespoon of cooking oil. 
  6. Let the oil heat for some time on a low flame. 
  7. When the oil is hot enough, add a tablespoon of cumin seeds. 
  8. By the way, adding cumin seeds in cooking oil when the oil is really hot makes a lot of difference in taste of this recipe as It will release the flavors nicely from the cumin seeds. 
  9. When the cumin seeds starts to flutter, add a pinch of hing. 
  10. Give it a mix and add an inch of ginger which has been finely chopped. Ginger is added to enhance the flavor of aloo jeera recipes. 
  11. Add 2 finely chopped green chilies. 
  12. Sauté them for a minute on a low flame. 
  13. Add 1/2 teaspoon of turmeric powder, 1 teaspoon of red chili powder, 1/2 teaspoon of coriander powder, and mix them well. 
  14. Amount of chili can always be adjusted according to your taste and this recipe can be made more spicy by adding additional spices. 
  15. Add salt as per taste and mix well 
  16. Sauté them on low flame for few seconds. Ensure not to burn the spices. 
  17. Add half-boiled and cooked potatoes. 
  18. Mix them well and give them a good toss. 
  19. If required, add a little bit of water and give them a good toss again. 
  20. Cover the lid and cook for 5 minutes on a low flame. 
  21. Open the lid and just mix them occasionally for 2 to 3 times. 
  22. When the potatoes have absorbed all spices, give it a Mix. 
  23. Finally add some finely chopped coriander leaves and mix it well. 
Aloo Jeera Dry is ready to be served. Garnish it with some fresh coriander leaves.

Serve the hot aloo jeera dry with chapatis, pooris, parathas or phulkas. You can also serve this as a side dish with dal-rice.

Youtube Video


***********************************************************************

Subscribe to my YouTube channel for new recipes!
https://www.youtube.com/channel/UCs28FxRyBwsYgOo0VLJzugQ

***********************************************************************
Follow me on...

Blogspot - https://myyummyrecipes1981.blogspot.com/
Facebook - https://facebook.com/myyummyrecipes1
Google Plus - https://plus.google.com/u/0/116660025106969274621/posts
Twitter - https://twitter.com/MyYummyRecipes
Instagram - https://www.instagram.com/myyummyrecipes1/
Tumblr - https://www.tumblr.com/blog/myyummyrecipesblog
Pinterest - https://in.pinterest.com/myyummyrecipes1/
LinkedIn - https://www.linkedin.com/in/anitha-kiran-0a41a0175/
Gmail - MyYummyRecipes1@gmail.com
Website - www.MyYummyRecipes.in

Saturday, October 27, 2018

Dal Fry (Healthy Indian Curry) {2018}

Dal Fry

Another popular, delicious, Indian dal or lentil recipe is Dal Fry. It is very famous in the road side dhabas and can be found in the menu of most restaurants. Dal Fry is usually prepared with tur dal also called as toor dal, toovar or pigeon pea lentils in English. It is made by adding boiled and softened Dal with a seasoning of onion, tomato and spices which have been tempered in ghee or cooking oil. Instead of just adding the toor dal, you can experiment by adding 1/4 cup of masoor dal (red split lentils) or moong dal (split yellow lentils) and 1/4 cup of toor dal. The ingredients that are used in a dal fry recipe varies depending on the region and personal choice.

Ingredients

  1. Toor Dal (Piegon Pea Lentils) - 1/2 cup
  2. Onion - 1 (medium sized, finely chopped)
  3. Tomato - 1 (medium sized, finely chopped)
  4. Green Chilies - 2 (half slit)
  5. Dry Red Chilies - 3 (kept whole, halved and deseeded)
  6. Curry Leaves - 10 to 12
  7. Ginger Garlic Paste - 1 Teaspoon 
  8. Mustard Seeds - 1/2 Teaspoon
  9. Cumin Seeds - 1 Teaspoon
  10. Hing (Asafoetida Powder) - 1 to 2 pinches
  11. Turmeric Powder - 1/4 Teaspoon
  12. Red Chili Powder - 1/2 Teaspoon
  13. Kasuri Methi (Dry Fenugreek Leaves) - 1 Teaspoon (Crushed)
  14. Garam Masala Powder - 1/4 Teaspoon (Optional)
  15. Ghee - 2 to 3 Tablespoons
  16. Lemon Juice - 1/2 Teaspoon (Optional)
  17. Coriander Leaves - Few (Finely Chopped)
  18. Salt as per taste
  19. Water - 1.5 cups or as required (for pressure cooking the dal)

Directions

  1. First, pressure cook the dal for making dal fry. 
  2. In a bowl, add 1/2 cup of toor dal. 
  3. Wash the dal in water for few times. 
  4. Add washed dal in a pressure cooker and add 1/4 teaspoon of turmeric powder. 
  5. Add 1 1/2 cup of water and pressure cook the dal for about 4 to 5 whistles on a medium flame till they are completely cooked and softened. 
  6. When the dal is cooked, lightly mash the dal with a wooden masher or a steel masher.
  7. Keep the mashed dal aside and move on to make the dal fry. 
  8. Take a wok and heat it for some time.
  9. When the wok is hot enough, add 2 tablespoons of ghee. Ghee can be replaced with cooking oil. However, a spoon of desi ghee or butter makes dal fry even more aromatic and delicious.
  10. When the ghee melts, add 1/2 teaspoon of mustard seeds and 1 teaspoon of cumin seeds.
  11. Allow the mustard seeds to splutter and then add a pinch of hing.
  12. Add a medium sized onion which has been finely chopped.
  13. Sauté the onion till it becomes translucent.
  14. Add a teaspoon of ginger garlic paste and sauté them until the raw smell of ginger garlic is gone. 
  15. Add 2 green chilies which have been half slit, 3 whole dry red chilies which have been deseeded and 10 to 12 curry leaves.
  16. Sauté them for few seconds.
  17. Add a medium sized tomato which has been finely chopped.
  18. Sauté the tomatoes until it becomes soft.
  19. Add the mashed dal and mix them well.
  20. Add just enough water little by little and mix it well to get a medium consistency. 
  21. Don't add too much of water because the consistency of dal fry is very critical. It should not be either thin or thick and it should be of smooth consistency. 
  22. Add 1/2 teaspoon of red chili powder and salt as per taste.
  23. Mix it well and cook them on a medium flame for 2 minutes till you get smooth and thick consistency.
  24. Add a teaspoon of crushed kasuri methi.
  25. Optionally, 1/4 teaspoon of garam masala powder can also be added to add that extra spicy and masala flavor to your dal fry.
  26. Mix it well and cook for a minute.
  27. Finally, add some finely chopped coriander leaves
  28. Mix it well.
  29. Lemon juice can also be added, if preferred. Adding lemon juice in the end gives an extra zing to your dal fry. Otherwise, lemon wedge can be served as optional
  30. Mix well.
  31. Switch off the flame.
  32. To garnish, sprinkle some finely chopped coriander leaves on top of the dal fry.
Dal fry is usually served hot and goes well with any of the Indian breads like Naan, Phulka, and Roti. Dal fry is equally enjoyable with Steamed Rice or Jeera Rice along with a papad, pickle or onion.

Youtube Video


----------------------------------------------------------------------------------
Subscribe to my YouTube channel for new recipes!
https://www.youtube.com/channel/UCs28FxRyBwsYgOo0VLJzugQ
---------------------------------------------------------------------------------------
Follow me on...
Facebook - https://facebook.com/myyummyrecipes1
Google Plus - https://plus.google.com/u/0/116660025106969274621/posts
Twitter - https://twitter.com/MyYummyRecipes
Pinterest - https://in.pinterest.com/myyummyrecipes1/my-yummy-recipes/
Instagram - https://www.instagram.com/myyummyrecipes1/
GMail - MyYummyRecipies@gmail.com
Website - www.MyYummyRecipes.in

Tuesday, October 16, 2018

6 Simple and Best Home Remedies for Cold and Cough (Easy and Quick) {2018}


Everyone suffers from cold and cough. Being an Indian, I would first try few home remedies before I switch to English medicines. In this video, I'm going to show you 6 simple home remedies for common cold and cough. And these recipes can be prepared very easily and quickly. 

#1 - Tulasi Kashayam or Holy Basil Syrup in English

For instant relief from cold, drink Tulasi Kashayam and it can cure acute running nose, cold and cough. 

Tulasi leaves and Black pepper corns cures common cold and other common respiratory problems. They are very good anti-biotic, anti-fungal, anti-oxidant, anti-bacterial and rich in Vitamin C. Tulasi leaves also controls blood glucose levels. 

Black pepper corns eases the congestion in the nose. 

Ginger is an excellent anti-inflammatory and kills cancer cells in the body. It heals sickness, reduces tenderness and pain by giving relief for cough and sore throat. Ginger also stimulates blood circulation in the body. 

Jaggery is very useful for respiratory problems like asthma and bronchitis as it prevents lung and throat infections in asthma patients. Due to its anti-allergic properties, it is also used as an effective treatment for chronic cough. 

Direction/Method

  1. In a bowl, add some water and allow it to boil. 
  2. When the water is boiling, add some fresh Tulasi leaves to it, an inch of chopped ginger, a teaspoon of black pepper corns, and 2 teaspoons of jaggery 
  3. Mix them well and allow it to boil for about 10 to 12 minutes. 
  4. After 10 minutes, strain the Tulasi Kashyam into a glass. 
  5. Drink this hot, and your cold and cough should run away. 

#2 - Turmeric Milk

Turmeric is known to treat viral infections such as cough and cold and it has an amazing antiseptic properties. Using Turmeric in Milk can quickly heal the cold and cough. 

To prepare, add a little bit of turmeric powder into a glass of warm milk. Mix well and it provides instant relief for an aching throat and runny nose. 

This is very helpful for kids, as well as adults suffering from common cold. 

#3 - Honey and Lemon

Honey is a wonderful remedy for a sore throat and it also relives coughs more effectively. Honey does the soothing, while the lemon juice can help with congestion. 

In a glass of warm water, just add 2 teaspoons of honey, 2 teaspoons of lemon juice and mix them well. You can also add a little bit of black pepper powder into this. 

#4 - Peppermint Kashayam / Syrup

Peppermint leaves are well known for their healing properties because Menthol in peppermint leaves soothes the throat and acts as a decongestant, helping to break down mucus. 

To do the peppermint kashayam 
  1. Take a bowl, add some water and allow it boil. 
  2. Add some fresh peppermint leaves when the water is boiling. 
  3. Boil it for 5 minutes. 
  4. Strain the Kashayam into a glass. 

#5 - Salt Water Gargling

This is an easy method. You just need to add some salt into a warm water and mix it well. 

Gargle it for few seconds. 

Salt water gargling soothes a scratchy throat that causes you to cough. This way it relives the irritation. 

Don't try this with kids who don't know how to gargle salt water. 

#6 - Warm Water

The best and easy way to cure cold and cough is to drink warm water frequently as it helps in fighting against common cold, cough and sore throat. Warm water also reduces inflammation in the throat. 

Comment below if you know any other home remedies that can cure common cold and cough. 

This video is just an educational video. If you have any pre-existing health conditions, please check with your physician before you try these home remedies. 

Youtube Video


----------------------------------------------------------------------------------
Subscribe to my YouTube channel for new recipes!
https://www.youtube.com/channel/UCs28FxRyBwsYgOo0VLJzugQ
---------------------------------------------------------------------------------------

Follow me on...
Facebook - https://facebook.com/myyummyrecipes1
Google Plus - https://plus.google.com/u/0/116660025106969274621/posts
Twitter - https://twitter.com/MyYummyRecipes
Pinterest - https://in.pinterest.com/myyummyrecipes1/
GMail - MyYummyRecipies@gmail.com
Website - www.MyYummyRecipes.in

Friday, August 31, 2018

Veg Machow Soup


Veg Manchow soup is one of the Indo-Chinese recipe that is very popular during winter season. It is a mixed vegetable soup mixed with mushrooms.

Ingredients

  1. Mushroom - 1/2 Cup (Sliced) 
  2. Carrot - 1/4 Cup (Finely Chopped) 
  3. Beans - 1/4 Cup (Finely Chopped) 
  4. Tomato - 1/4 Cup (Finely Chopped) 
  5. Cabbage - 1/4 Cup (Finely Chopped) 
  6. Capsicum - 1/4 Cup (Finely Chopped) 
  7. Garlic - 1 Teaspoon (Finely Chopped) 
  8. Ginger - 1 Teaspoon (Finely Chopped) 
  9. Green Chili - 3 (Finely Chopped) 
  10. Coriander Leaves - 1 Tablespoon (Finely Chopped) 
  11. Corn Flour - 1 Tablespoon 
  12. Tomato Sauce - 1 Tablespoon 
  13. Red Chili Sauce - 1 Tablespoon 
  14. Soya Sauce - 1 Teaspoon 
  15. Vinegar - 1 Tablespoon 
  16. Black Pepper Powder - 1 Teaspoon 
  17. Cooking Oil - 2 tablespoon + 1/2 teaspoon 
  18. Wheat Noodles - little 
  19. Salt as per taste 

Direction/Method

  1. Pour some water in wok. 
  2. When the water is boiling, add 1/2 teaspoon of salt and 1/2 teaspoon of cooking oil. 
  3. Add noodles into the water and boil them for about 70%. 
  4. When the noodles are boiled, strain them. 
  5. To ensure that the noodles don't get sticky, pour some cold water on top of them. 
  6. When the noodles are not hot enough, deep fry them in hot cooking oil. 
  7. Fry them until the color changes a little. 
  8. When it is done, keep them aside. 
  9. Next, in a pan, add 2 tablespoons of cooking oil and let it heat for some time. 
  10. When the cooking oil is hot enough, add 1 teaspoon finely chopped garlic, 1 teaspoon finely chopped ginger, 3 finely chopped green chili. 
  11. Sauté them for few seconds. 
  12. Add 1/4 cup of finely chopped beans and 1/4 cup of finely chopped carrot. 
  13. Mix well and sauté them for about a minute. 
  14. Add 1/4 cup of finely chopped capsicum, 1/4 cup of finely chopped cabbage, and 1/4 cup of finely chopped tomatoes. 
  15. Mix well and sauté them for about a minute. 
  16. Add 1/2 cup of sliced mushrooms., 
  17. Mix well and sauté them for about a minute. 
  18. Add 4 cups of water into this and mix them well. 
  19. Cook them until they come to boil. 
  20. If the soup has come to boiling then add 1 tablespoon of tomato sauce, 1 tablespoon of red chili sauce, 1 teaspoon of soya sauce, 1 tablespoon of vinegar, 1 teaspoon of black pepper powder, and salt as per taste, 
  21. Add finely chopped coriander leaves. 
  22. Prepare the corn starch by adding water into 2 teaspoons of corn starch. 
  23. Mix it well and make a thin corn starch paste. 
  24. Mix them well and cook them for about 2 to 3 minutes. 
  25. After 3 minutes, stir it again. 
  26. When you see the thick consistency of the soup, that's it, the mushroom and veg manchow soup is ready to be served. 
  27. Before serving, break the fried noodles into small pieces. 
  28. Garnish soup with fried noodles.

Youtube Video


----------------------------------------------------------------------------------
Subscribe to my YouTube channel for new recipes!
https://www.youtube.com/channel/UCs28FxRyBwsYgOo0VLJzugQ
---------------------------------------------------------------------------------------

Follow me on...
Facebook - https://facebook.com/myyummyrecipes1
Google Plus - https://plus.google.com/u/0/116660025106969274621/posts
Twitter - https://twitter.com/MyYummyRecipes
Pinterest - https://in.pinterest.com/myyummyrecipes1/
GMail - MyYummyRecipies@gmail.com
Website - www.MyYummyRecipes.in

Tuesday, August 28, 2018

Dry Fruits Laddu | Healthy Ladoo


Dry fruits laddu is a very good alternative for people who like to eat sweets but prefer to be on diet. Dry fruits laddu is also very healthy because of its ingredients such as dates and almonds.

Ingredients

  1. Dates Seedless - 1 Cup
  2. Puppy Seeds - 1 Tablespoon
  3. Almonds - 1/2 Cup (finely chopped)
  4. Pistachio - 1/2 Cup (finely chopped)
  5. Cashew nuts - 1/2 Cup (finely chopped)
  6. Ghee - 1 Tablespoon
  7. Raisins - 1/4 Cup
  8. Cardamom Powder - 1/4 Teaspoon

Directions

  1. Add a cup of seedless dates into a blending jar.
  2. Blend the dates into a coarse paste.
  3. Transfer the coarse paste into a bowl.
  4. In a hot pan, add 1 tablespoon of puppy seeds and fry them until the aroma comes out.
  5. When the aroma comes out, transfer the roasted puppy seeds into a bowl.
  6. In the same pan, add 1 tablespoon of ghee, 1/2 cup of finely chopped almonds, 1/2 cup of finely chopped pistachio, 1/2 cup of finely chopped cashew nuts and 1/4 cup of raisins.
  7. Mix them well and fry them for about 3 minutes on a low flame.
  8. Add the coarse dates paste.
  9. Break and fry the dates until they become soft or release the oil.
  10. Add roasted puppy seeds and 1/4 teaspoon of cardamom powder.
  11. Mix well.
  12. Switch off the flame and transfer the laddu mixture to a plate.
  13. Grease your palm with the little ghee.
  14. Before the mixture gets dried out, make the laddu quickly by taking a small amount of mixture and rolling them into laddu sized balls.
  15. That is it. Healthy dry fruits laddu is ready to eat.

Youtube Video


----------------------------------------------------------------------------------
Subscribe to my YouTube channel for new recipes!
https://www.youtube.com/channel/UCs28FxRyBwsYgOo0VLJzugQ
---------------------------------------------------------------------------------------

Follow me on...
Facebook - https://facebook.com/myyummyrecipes1
Google Plus - https://plus.google.com/u/0/116660025106969274621/posts
Twitter - https://twitter.com/MyYummyRecipes
Pinterest - https://in.pinterest.com/myyummyrecipes1/
GMail - MyYummyRecipies@gmail.com
Website - www.MyYummyRecipes.in

Wednesday, August 15, 2018

Aloo Matar Paratha | Green Peas Potato Paratha


One of the classic Indian whole wheat bread that everyone loves to eat are parathas. How about I show you how to make Aloo Matter Paratha which is nothing but green peas and potatoes stuffed with little masala. 

You can also make just the aloo paratha or just the green peas paratha. But in this video, I'll mix them together along with some spices to give an unique twist while enhancing the taste of your parathas.

Ingredients

  1. Potato (Boiled) - 1/2 Cup 
  2. Green Peas (Boiled) - 1/2 Cup 
  3. Cooking Oil - 2 - 3 Tablespoons 
  4. Butter or Ghee - 2 Tablespoons 
  5. Ginger Garlic Paste - 1 Teaspoon 
  6. Green Chili Paste - 1/2 Teaspoon 
  7. Onion (Chopped) - 1 Medium 
  8. Turmeric Powder - 1/4 Teaspoon 
  9. Red Chili Powder - 1 Teaspoon 
  10. Coriander Powder - 1/2 Tesapoon 
  11. Garam Masala Powder - 1/2 Teaspoon 
  12. Coriander Leaves (Finely Chopped) - 2 Springs 
  13. Wheat Flour - 2 Cups + 2 Teaspoon 
  14. Salt as per taste 

Directions

  1. First step, prepare the dough for paratha. 
  2. To do that, add 2 cups of wheat flour and some salt in a bowl. 
  3. Mix the flour and salt together. 
  4. By the way salt is used to tighten the dough and obviously for taste. 
  5. Create a small well in the flour and add water little by little to make a soft chappathi dough. 
  6. You don't want to add too much of water, all at once. 
  7. Keep kneading the dough until it becomes very soft. 
  8. Add little more water if required. 
  9. To ensure that the dough doesn't sticky, I’m going to add 1 tablespoon of cooking oil and knead the dough again for a minute. 
  10. Ok, the paratha dough is ready, cover the bowl and rest it until we prepare the masala filling for the parathas. 
  11. Now we will make the filling for the parathas. 
  12. For which I've two main ingredients of this recipe - 1/2 cup of boiled potatoes and 1/2 cup of boiled green peas. 
  13. I'll add them into a bowl. 
  14. It is very important that you mash them well to remove any lumps. 
  15. After that’s done. 
  16. Take a pan and put it on a medium flame. 
  17. In goes a tablespoon of cooking oil and a tablespoon of butter. 
  18. Allow the butter to melt. 
  19. We will then add 1 teaspoon of ginger garlic paste and 1/2 teaspoon of green chili paste. 
  20. Saute them for few seconds until the raw smell comes out. 
  21. Into this, add a finely chopped onion, sauté it for a minute until they have becomes little translucent. 
  22. Throw in your spices, 1/4 teaspoon of turmeric powder, a teaspoon of red chili powder, 1/2 teaspoon of coriander powder, and 1/2 teaspoon of garam masala. 
  23. Give that a real good mix. 
  24. Add mashed potatoes & green peas. Mix them well. 
  25. Add salt as per taste and mix them well 
  26. Lastly add finely chopped coriander leaves, and mix well. 
  27. The paratha filling is ready. 
  28. Back to the dough, grease your hand with a little cooking oil and knead the dough again for a minute. 
  29. Divide the dough into lemon sized balls. 
  30. Take the chapati roller. 
  31. Sprinkle little bit of flour on top. 
  32. Take a dough ball, and roll it to a small circle. 
  33. Place a tablespoon of filling on top of it. Don't add too much of filling. Otherwise, the dough will tear and the filling will come out while rolling. 
  34. Close the edges like this, and flatten them slightly with your palm to make them look like a bun. 
  35. Sprinkle again a little bit of flour, and carefully roll the dough ball to a big circle. 
  36. Take your time to roll them gently. Or else the dough will tear. 
  37. If you see the filling coming out, just sprinkle the flour generously on it and keep rolling gently. 
  38. Final step is to heat the stuffed paratha. 
  39. Heat a tawa on a medium flame. 
  40. Pour a tablespoon of cooking oil. 
  41. When the oil is well heated, place the stuffed paratha in the center. 
  42. When you see these small bubbles popping up, flip it other side. 
  43. Place a butter cube on top, although it is optional. But these parathas tastes better with Butter. 
  44. Pan fry them evenly on both sides. 
  45. The delicious aloo matar paratha is ready. Serve these parathas for breakfast and sometimes for brunch and dinner with any pickles, chutney, sauce, raita, or just with curd. 
With practice, you too can make perfect parathas. Give it a try and let me know how it works out for you. 

Youtube Video


----------------------------------------------------------------------------------
Subscribe to my YouTube channel for new recipes!
https://www.youtube.com/channel/UCs28FxRyBwsYgOo0VLJzugQ
---------------------------------------------------------------------------------------
Follow me on...
Facebook - https://facebook.com/myyummyrecipes1
Google Plus - https://plus.google.com/u/0/116660025106969274621/posts
Twitter - https://twitter.com/MyYummyRecipes
Pinterest - https://in.pinterest.com/myyummyrecipes1/
GMail - MyYummyRecipies@gmail.com
Website - www.MyYummyRecipes.in

Wednesday, August 8, 2018

Baby Corn Masala


In this article, I'll show you how to prepare Baby Corn Masala.

Ingredients

  1. Cooking Oil / Butter - 2 Tablespoons 
  2. Baby Corn - 7 (half slit) 
  3. Bayleaf - 1 
  4. Cinnamon Stick - 1 Inch 
  5. Cardamom - 2 Pods 
  6. Cumin Seeds - 1 Teaspoon 
  7. Onion - 1 (finely chopped) 
  8. Ginger Garlic Paste - 1 Teaspoon 
  9. Turmeric Powder - 1/4 Teaspoon 
  10. Red Chili Powder - 1 Teaspoon 
  11. Coriander Powder - 1 Teaspoon 
  12. Cumin Powder - 1/4 Teaspoon 
  13. Tomato Puree - 2 cups 
  14. Salt as per taste 
  15. Cashew nut paste - 1/4 cup 
  16. Water 
  17. Garam Masala Powder - 1/4 Teaspoon 
  18. Kasuri Methi - 1 Teaspoon (Crushed) 
  19. Coriander Leaves - Few (Finely Chopped) 

Directions

  1. First, boil the baby corns in hot water. Instead of boiling these baby corns, they can be pan fried as well. 
  2. In a pot with water on a high flame, add 7 baby corns which have been half slit
  3. Add a little bit of salt as well. 
  4. Boil these baby corns for about 8 to 10 minutes until they become little soft. 
  5. In the meantime, prepare the masala for the curry. 
  6. Add 2 tablespoons of cooking oil into a wok. 
  7. When the cooking oil is hot enough, add a bay leaf, an inch of cinnamon stick, two pods of cardamom and 1 teaspoon of cumin seeds 
  8. Sauté them until the aroma comes out. 
  9. Add an Onion which has been finely chopped. 
  10. Sauté the Onions until it becomes little translucent. 
  11. Next, add a teaspoon of Ginger Garlic paste. 
  12. Sauté them for a minute, until the raw smell comes out. 
  13. Add 1/4 teaspoon of Turmeric powder, 1 teaspoon of red chili powder, 1 teaspoon of coriander powder, and 1/4 teaspoon of cumin powder. 
  14. Mix them well and sauté for a minute. 
  15. Add 2 cups of Tomato puree and salt as per taste. 
  16. Mix them well. 
  17. Allow them to cook for 2 to 3 minutes. 
  18. If the baby corns are boiled then transfer them into a bowl.
  19. Add the boiled baby corns into the masala mixture. 
  20. Stir them well with the masala mixture. 
  21. Close the wok with lid and cook it for about 8 to 10 minutes or until the oil separates. 
  22. After 10 minutes,  open the lid and give it a good mix. 
  23. Add 1/4 cup of cashew nut paste and using the same cup, add little water to adjust the consistency of the curry by adding little water. 
  24. Give them a good mix and cook it for a minute. 
  25. Add 1/4 teaspoon of Garam Masala powder and 1 teaspoon of crushed Kasuri Methi. 
  26. Add few chopped coriander leaves. 
  27. Mix them well and the Baby Corn Masala is ready. 
Serve it with your favorite Indian breads such as rotis, kulchas, naans, chappatis or pulkas.

Youtube Video


----------------------------------------------------------------------------------
Subscribe to my YouTube channel for new recipes!
https://www.youtube.com/channel/UCs28FxRyBwsYgOo0VLJzugQ
---------------------------------------------------------------------------------------
Follow me on...
Facebook - https://facebook.com/myyummyrecipes1
Google Plus - https://plus.google.com/u/0/116660025106969274621/posts
Twitter - https://twitter.com/MyYummyRecipes
Pinterest - https://in.pinterest.com/myyummyrecipes1/
GMail - MyYummyRecipies@gmail.com
Website - www.MyYummyRecipes.in

Wednesday, July 18, 2018

Green Peas Curry | Matar Curry | Matar Masala


Green peas curry, also called as Matar ka curry or masala is a very popular main course Indian dish prepared with green peas and tomatoes.

Ingredients

  1. Green Peas (fresh) - 1 cup 
  2. Tomato (chopped) - 4 
  3. Onion(sliced)- 1 
  4. Cooking Oil - 1 tablespoon 
  5. Butter or Ghee - 1 tablespoon and another tablespoon of butter for garnishing. 
  6. Cinnamon stick - 1 inch 
  7. Cloves - 4 
  8. Cumin - 1 teaspoon 
  9. Cashew nuts - 1/4 teaspoon 
  10. Ginger Garlic Paste - 1 teaspoon 
  11. Turmeric Powder - 1/4 teaspoon 
  12. Red Chili Powder - 1 1/2 teaspoon 
  13. Coriander Powder - 1 teaspoon 
  14. Garam Masala Powder - 1/4 teaspoon 
  15. Salt as per taste 
  16. Fresh Coriander Leaves - 1 tablespoon and little more for garnishing 

Direction/Method

  1. Use 1 cup of either fresh green peas or frozen green peas for this recipe. 
  2. First, blend 1 sliced onions using a blending jar. 
  3. Add little bit of water to blend sliced onions into a fine puree. 
  4. When the puree is ready, transfer it into a bowl. 
  5. In the same jar, add 4 chopped tomatoes and add little water to blend them into a fine puree. 
  6. When the tomato puree is ready, transfer it into a bowl. 
  7. Next, in a wok, add 1 tablespoon of cooking oil and add 1 tablespoon of butter. 
  8. Allow the butter to melt on a medium flame. 
  9. When the butter is melted, add 2 cinnamon sticks, 4 to 5 cloves, 1 teaspoon of cumin seeds, and 1/4 cup of cashew nuts. 
  10. Fry them lightly. 
  11. Add 1 teaspoon of ginger garlic paste and mix it well until the raw smell comes out. 
  12. Next, add onion puree and mix it well. 
  13. Sauté the onion puree for a minute. 
  14. Add 1/4 teaspoon of turmeric powder, 1 1/2 teaspoon of red chili powder, and 1 teaspoon of Coriander powder. 
  15. Mix it well and sauté them for few seconds. 
  16. Add tomato puree and mix it well. 
  17. Allow them to cook for about 3 minutes on a low flame. 
  18. Add salt as per taste and mix it well. 
  19. Add green peas and mix them well. 
  20. Add little bit of water to adjust the consistency of the curry and mix it well 
  21. Close the wok with a lid and cook it for about 10 minutes. 
  22. Open the lid and check if the green peas are cooked. 
  23. When green peas are cooked, add 1/4 teaspoon of garam masala powder and 1 tablespoon of finely chopped coriander leaves. 
  24. Mix it well and switch off the flame. 
  25. The Green Peas Curry is ready to be served. 
You can serve this curry with chapathis, parathas, naans or rotis. 

Youtube Video


----------------------------------------------------------------------------------
Subscribe to my YouTube channel for new recipes!
https://www.youtube.com/channel/UCs28FxRyBwsYgOo0VLJzugQ
---------------------------------------------------------------------------------------
Follow me on...
Facebook - https://facebook.com/myyummyrecipes1
Google Plus - https://plus.google.com/u/0/116660025106969274621/posts
Twitter - https://twitter.com/MyYummyRecipes
Pinterest - https://in.pinterest.com/myyummyrecipes1/
GMail - MyYummyRecipies@gmail.com
Website - www.MyYummyRecipes.in

Wednesday, July 4, 2018

Pumpkin Masala / Kaddu ka Sabji


Pumpkin are used differently in both savory and dessert dishes. Below is the recipe on how to prepare delicious Pumpkin or Kaddu Sabji for Poori and Chapathi.

Ingredients

  1. Pumpkin (washed and cut into cubes) - 1 bowl or about 500g
  2. Cooking Oil - 2 to 3 Tablespoons
  3. Urad Dal - 1/2 Teaspoon
  4. Green Chili (chopped) - 2
  5. Curry Leaves - few 
  6. Mustard Seeds - 1/2 Teaspoon
  7. Turmeric Powder - 1/3 Teaspoon
  8. Coriander Powder - 1 Teaspoon
  9. Garam Masala - 1/4 Teaspoon
  10. Onion (medium sized) - 1 (Finely chopped)
  11. Red Chili Powder - 1/2 Teaspoon
  12. Coriander Leaves (chopped) - 1 Tablespoon
  13. Salt as per taste

Directions

  1. Let a pan heat for sometime on low flame.
  2. Pour 3 tablespoons of cooking oil.
  3. When the cooking oil is hot enough, add 1/2 teaspoon of mustard seeds and 1/2 teaspoon of cumin seeds.
  4. When the mustard seeds start to flutter, add 1/2 teaspoon of urad dal, 2 finely chopped green chilies, few curry leaves, and sauté them for few seconds.
  5. Add 1 medium size finely chopped onions
  6. Mix and sauté them until the onions become little translucent.
  7. Add 1/3 teaspoon of turmeric powder, 1/2 teaspoon of red chili powder, 1 teaspoon of coriander powder and 1/4 teaspoon of garam masala powder.
  8. Mix them well.
  9. Add pumpkin which has been washed and cut into cubes, about 500g or one bowl
  10. Mix it well till pumpkin pieces are coated well with the masalas.
  11. Add salt as per taste and mix well.
  12. Cover the lid and cook it for about 10 minutes on a low flame.
  13. Open the lid, and mix it again for few seconds.
  14. If you want more soft to cook pumpkin cook it for another 2 minutes.
  15. Lastly, add 1 tablespoon of chopped coriander leaves and mix it well.
The pumpkin masala is ready to be served. Serve with poori, rice or chapathis.

----------------------------------------------------------------------------------

Youtube Video


----------------------------------------------------------------------------------

Subscribe to my YouTube channel for new recipes!
https://www.youtube.com/channel/UCs28FxRyBwsYgOo0VLJzugQ

---------------------------------------------------------------------------------------

Follow me on...

Facebook - https://facebook.com/myyummyrecipes1
Google Plus - https://plus.google.com/u/0/116660025106969274621/posts
Twitter - https://twitter.com/MyYummyRecipes
Pinterest - https://in.pinterest.com/myyummyrecipes1/
GMail - MyYummyRecipies@gmail.com
Website - www.MyYummyRecipes.in

Friday, June 29, 2018

Wadi Ka Biryani / Pulao


Wadi Vegetable Pulao also known as Amritsar Wadi Ki Biryani. One of the main ingredient in this recipe is Wadis which is made of dal, either urad dal or moong dal, and it is flavored with spices. Wadis are generally used in northern India areas like Punjab. Amritsar is famous for its wadis.

Ingredients

  1. Spicy Urad Dal Wadis - 10 to 12
  2. Cauliflower (florets) - 10 to 15
  3. Carrot (cut into cubes) - 1/2 Cup
  4. Green Peas - 1/2 Cup
  5. French beans (chopped) - 1/2 Cup
  6. Basmati Rice (soaked for an hour and drained) - 1 1/2 Cup
  7. Cooking Oil - 2 Tablespoons
  8. Cinnamon Stick - 1/2 inch
  9. Cloves - 4
  10. Black Peppercorns - 4
  11. Bay Leaves - 2
  12. Ginger Garlic Paste - 2 Teaspoons
  13. Green Chili Paste - 1 Teaspoon
  14. Onion (sliced, medium size) - 1
  15. Turmeric Powder - 1/2 Teaspoon
  16. Tomato - 1 (medium size, finely chopped)
  17. Salt as per taste
  18. Coriander Leaves (chopped) - 2 Tablespoons 

Direction/Method

  1. First, it is important to wash and clean the Cauliflower florets using hot water. 
  2. In a bowl of hot water, add a little bit of salt and mix it well. 
  3. Add 10 to 15 Cauliflower florets. 
  4. Leave them for few minutes in the hot water. This will remove any dirt or bacteria on them. 
  5. Transfer them into a bowl. 
  6. In a wok on a medium flame, add 2 tablespoons of cooking oil. 
  7. When the oil is hot enough, add the whole masalas such as 1/2 inch Cinnamon stick, 4 Cloves, 4 Pepper corns, and 2 Bay leaves. 
  8. Saute them for few seconds. 
  9. Add 2 teaspoons of Ginger Garlic Paste and 1 teaspoon of Green Chili Paste. 
  10. Saute them again until I start to smell the aroma of Ginger and Garlic. 
  11. Next, add 1 medium sized sliced Onions. 
  12. Mix and saute them till the Onions become little translucent. 
  13. Add 1/2 teaspoon of turmeric powder, cauliflower florets, 1/2 cup of carrot (cut into cubes), 1/2 cup of green peas, 1/2 cup of chopped French beans, and salt as per taste.
  14. Mix it well. 
  15. Add 1/2 cup of Basmathi rice which is soaked for an hour and drained. You cannot just use any rice. 
  16. Mix it well and simmer it for 2 minutes. 
  17. In the meantime, we will shallow fry these wadis. I've made a video on how to make wadis. So watch the video on how to make home made wadis. The link is the description. 
  18. In another pan on high flame, add some cooking oil into the pan just enough to shallow fry the wadis because we are not going to deep fry them. 
  19. When the oil is hot enough, add 10 to 12 wadis and shallow fry them for a minute, just to get the rawness out of them. 
  20. When the wadis are fried, take them out and put them in a bowl. Allow them to cool for some time. 
  21. Boil 3 cups of water on a low flame in a pot. 
  22. Back to the rice, give it a mix. 
  23. Add 1 medium sized Tomato which has been finely chopped and mix well. 
  24. Add the fried wadis into the rice, saute them on low flame for 2 minutes. 
  25. Add the hot water into this. 
  26. Give them mix. Lets cover the wok and cook it on low flame for 8 to 10 minutes. 
  27. Open the lid and it should be done. 
  28. Add 1 tablespoon of chopped coriander leaves and mix it well. 
This is how you prepare Amritsar Wadi Ki Biryani or Wadi Vegetable Pulao, loaded with all the goodness of wadis and vegetable. 

Serve this pulao with a good raitha such as Burani Raita I've already made a video on how to make make Burani Raita. So go and watch the video. The link is the description.

Youtube Video


----------------------------------------------------------------------------------
Subscribe to my YouTube channel for new recipes!
https://www.youtube.com/channel/UCs28FxRyBwsYgOo0VLJzugQ
---------------------------------------------------------------------------------------
Follow me on...
Facebook - https://facebook.com/myyummyrecipes1
Google Plus - https://plus.google.com/u/0/116660025106969274621/posts
Twitter - https://twitter.com/MyYummyRecipes
Pinterest - https://in.pinterest.com/myyummyrecipes1/
GMail - MyYummyRecipies@gmail.com
Website - www.MyYummyRecipes.in

Tuesday, June 26, 2018

Bhurani Raita / Burani Raita


Burani raita is one of the Mughal recipes. It is a type of raita which is unique and awesome when had with biryani. Adding a zest of garlic juice into this raita makes it unique. Raita with garlic flavor gives an interesting zing to your Biryani.

Ingredients

  1. Yogurt (Thick) - 1 Cup 
  2. Garlic Puree - 1 Teaspoon 
  3. Red Chili Powder - A pinch 
  4. Cumin Powder (Roasted) - A pinch 
  5. Milk - 1/4 Cup (Boiled and Cooled) 
  6. Salt as per taste

Direction/Method

  1. In a bowl, add 1 cup of nice thick yogurt. 
  2. Whisk it well. 
  3. Add 1 teaspoon of garlic puree using a strainer. So only the water with garlic flavor goes into this. 
  4. Garlic puree is made by grinding few garlic cloves with little water. 
  5. Add salt as per taste. If preferred, regular salt can be replaced with black salt. 
  6. Add a pinch of red chili powder. 
  7. To get the consistency of raita, add 1/4 cup of boiled and cooled milk to this 
  8. Mix it well. 
  9. If preferred, replace milk with water. But for a Mughlai recipe, milk is recommended. 
  10. When you see the thin consistency of raita, Burani Raita is ready to be served. 
  11. Do you know why raita is used with a dish like Biryani? Because it cools down all that heat produced by the spices and the chicken / mutton that we add into Biryani. 
  12. You can serve this in a small bowl and you can garnish this by sprinking roasted cumin powder and topping up with mint leaves. 
You can also serve this raita not just with non-vegeterian Biryani but also with vegetarian biryani and pulao. And I'm sure this raita will give an exciting flavour to your Biryani or Pulao.

Youtube Video


----------------------------------------------------------------------------------
Subscribe to my YouTube channel for new recipes!
https://www.youtube.com/channel/UCs28FxRyBwsYgOo0VLJzugQ
---------------------------------------------------------------------------------------
Follow me on...
Facebook - https://facebook.com/myyummyrecipes1
Google Plus - https://plus.google.com/u/0/116660025106969274621/posts
Twitter - https://twitter.com/MyYummyRecipes
Pinterest - https://in.pinterest.com/myyummyrecipes1/
GMail - MyYummyRecipies@gmail.com
Website - www.MyYummyRecipes.in

Friday, June 15, 2018

How to make Wadis / Wadiyan / Vadiyal / Vadiyalu


Learn how to make home made Wadis. Wadi or Wadiyan are a specialty of Punjabi Cuisine. Wadis are urad dal dumplings which have been sun dried. They are made in both northern states as well as southern states of India. The Wadis are also called as Wadiyan in north India, and Vadiyal or Vadiyalu in South India. 

Ingredients

  1. Urad Dal - 1/4 Kg 
  2. Ginger (Finely Shredded) - 1 inch 
  3. Pumpkin - 1 cup (Deseeded, Finely shredded) 
  4. Jeera Powder - 2 Tablespoons 
  5. Coarse Red Chilli - 2 1/2 Tablespoons 
  6. Garam Masala powder - 1 Teapoon 
  7. Coarse Dhaniya - 2 1/2 Tablespoons 
  8. Pepper Powder - 1/2 Teaspoon 
  9. Hing Powder - A pinch 
  10. Fresh Coriander Leaves - Finely Chopped 
  11. Salt as per taste 

Direction

  1. Take quarter kilogram of Urad Dal in a bowl and wash it with water. 
  2. To clean the dirt, wash the Urad dal twice. 
  3. Rinse them in water and soak for four hours. 
  4. After four hours, Urad dal's size would have increased a little. 
  5. Add the soaked urad dal into a blending jar. 
  6. Don't need to add additional water into this. But if required, you can add little water. 
  7. Blend it into a coarse paste. 
  8. Transfer the coarse paste into a big bowl. 
  9. Mix it well and cover the bowl with a lid. 
  10. Ferment the paste for at least for a night. 
  11. When fermented, the coarse paste would puff up a little bit. 
  12. Beat the paste for at least 8 to 10 minutes. 
  13. To see if it is ready, add a little paste into a cup of water and if it floats on top of the water then it is ready. 
  14. Add an inch of ginger which has been finely shredded. 
  15. Add a cup of finely shredded pumpkin. 
  16. Mix them well. 
  17. Add 2 tablespoons of jeera powder, 1/2 teaspoon of pepper powder, 2 1/2 tablespoons of coarse red chili, 1 teaspoon of garam masala powder, 2 1/2 tablespoons of coarse dhaniya and a pinch of hing powder. 
  18. Adjust the spice if required. Because the Wadis are done starting from more spicy, less spicy to bland ones. 
  19. Add few fresh coriander leaves which has been finely chopped and salt as per taste. 
  20. Mix every thing well. 
  21. Make small dumplings of Wadi mixture 
  22. You can make, either small dumplings or big dumplings. The small ones get sun dried very fast. 
  23. Finally, sun dry them until they become hard. 

The shelf life of these wadis is one year. But it is recommended to sun dry them, every now and then. Using these wadis, you can prepare recipes such as Biryani or Pulao.

Wadis are a good source of protein and when used with biryani recipes, these dumplings makes any biryani fantastic.

Youtube Video


----------------------------------------------------------------------------------
Subscribe to my YouTube channel for new recipes!
https://www.youtube.com/channel/UCs28FxRyBwsYgOo0VLJzugQ
---------------------------------------------------------------------------------------
Follow me on...
Facebook - https://facebook.com/myyummyrecipes1
Google Plus - https://plus.google.com/u/0/116660025106969274621/posts
Twitter - https://twitter.com/MyYummyRecipes
Pinterest - https://in.pinterest.com/myyummyrecipes1/
GMail - MyYummyRecipies@gmail.com
Website - www.MyYummyRecipes.in

Wednesday, June 6, 2018

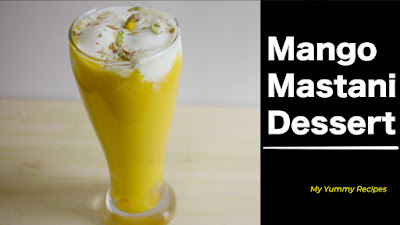
Mango Mastani Dessert (Mango Shake)

Mango Mastani is a tasty desert and specially refreshing summer drink. It is vary easy to make and similar to the mango milk shake, but bit more interesting.

Ingredients

  1. Mangoes - 3 (Peeled and cut into small cubes) 
  2. Milk (Boiled and cooled) - 2 Cups 
  3. Vanilla Ice Cream - 2 Scoops per serving 
  4. Sugar - 6 teaspoons 
  5. Pista (sliced) - Few 
  6. Almonds (sliced) - Few 

Direction/Method

  1. In a jar, add 3 Mangoes, cut into small cubes, 2 cups of boiled and cooled Milk, 6 teaspoons of Sugar. 
  2. Blend them well. Add little more Milk, if required, to get the consistency similar to a Milk shake. 
  3. In a serving glass, first, add few small cubes of Mangoes. 
  4. Now add the Mango shake. 
  5. Top it up with one or two scoops of any ice cream. I have selected Vanilla ice cream for this dessert. 
  6. Again, add 2 to 3 small cubes of Mangoes. 
  7. Finally, garnish it with sliced Pista and Almonds. 
The Mango Mastani Dessert is ready to be served.

Youtube Video


----------------------------------------------------------------------------------
Subscribe to my YouTube channel for new recipes!
https://www.youtube.com/channel/UCs28FxRyBwsYgOo0VLJzugQ
---------------------------------------------------------------------------------------
Follow me on...
Facebook - https://facebook.com/myyummyrecipes1
Google Plus - https://plus.google.com/u/0/116660025106969274621/posts
Twitter - https://twitter.com/MyYummyRecipes
Pinterest - https://in.pinterest.com/myyummyrecipes1/
GMail - MyYummyRecipies@gmail.com
Website - www.MyYummyRecipes.in